If you have some rectangle or landscape photos on your phone and you want to upload them to Instagram, it is better to make the photo square. If you do not want to crop your beautiful images, you can try these Android, iOS, Mac, Windows, and online apps to make photo square for Instagram.
Yes, the latest change has made it possible for users to upload a rectangle photo to Instagram, but there is and always will be a separate fanbase for the square photos. There are several ways and apps for your desired platform to make photo square without cropping. Though I personally use Photoshop to make square photo on my computer, I have recently tried some mobile apps to do the same.
Best Android and iPhone apps to make photo square
Best Android and iPhone apps to make photo square are:
- Square Quick
- Square Pic
- Squaready
1. Square Quick
Square Quick is best for those Android users, who like to have some photo editing options other than making a photo square. As it makes the selected photo square automatically, you do not have to go through a lot of steps to get the job done. It expands the background automatically to make photo square, and you can fill in the extended background with a solid color or add a gradient effect.
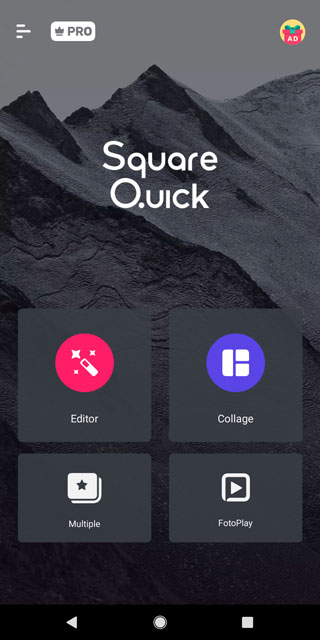
1: At first, install the Square Quick app from the Google Play Store and open it on your Android mobile.
2: Tap on the Editor option to select it.
3: Open an image that you want to make square. It is possible to choose any image available on your mobile.
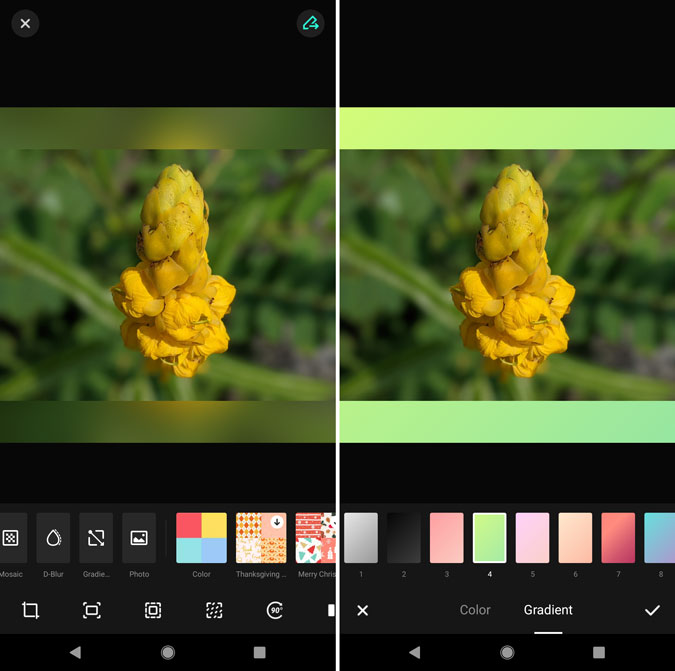
4: Find the square image on your screen. If you want to change the default background color, white, tap on the Color option.
5: Choose your desired color or opt for the gradient option. The only problem is that you cannot select a custom color, but the given list is huge.
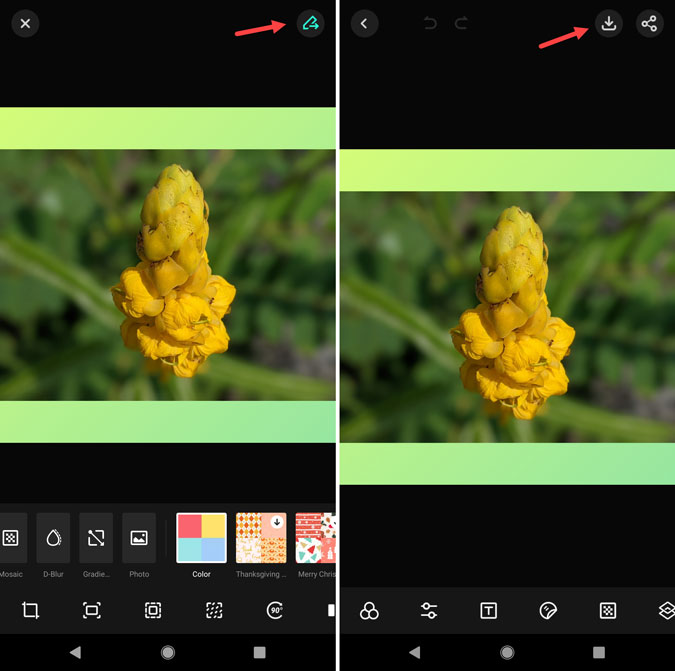
6: Tap on the top-right corner icon and select the save option.
Now you can find a square photo that you can upload on almost any social media platform, including Instagram, Facebook, etc.
Get Square Quick from here.
2. Square Pic
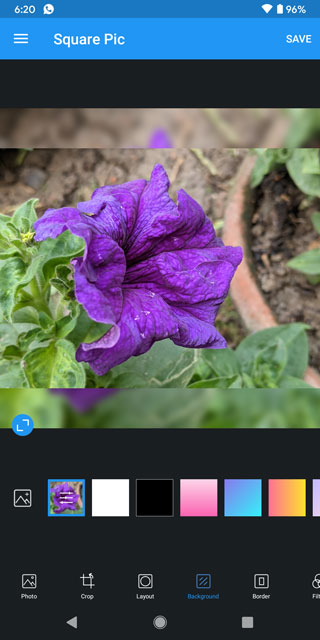
Square Pic is the most suitable app for those, who need the option to change the background layout while making a square photo. It has almost all the options that Square Quick offers but you can find another useful option called Layout. At times, you might want to get a different layout while making multiple square photos. That is possible with Square Pic for Android.
1: At first, install the app from Google Play Store and open it by giving the file system access.
2: Tap the gallery icon to select a photo.
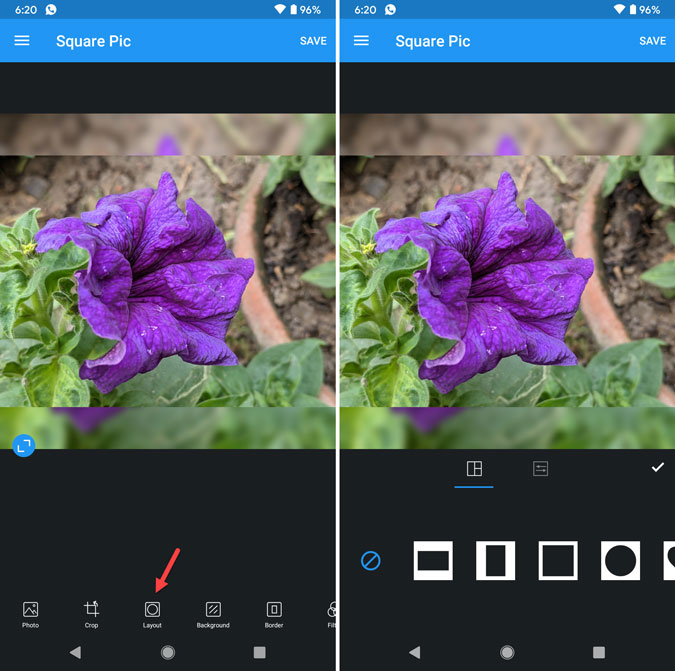
3: Tap on the Layout option to choose a layout for your square photo. You can make the original image smaller or bigger as well.
4: Switch to the Background tab and choose a background color. It is possible to select a gradient color in case you do not want to show the original image in the background.
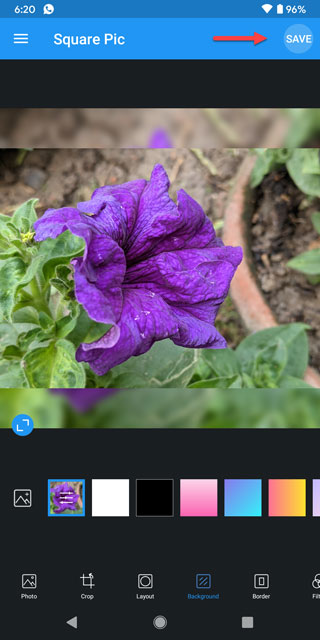
5: At last, tap the SAVE button visible on the top-right corner.
Now you can share the image with friends or upload it on Instagram.
Get Square Pic from here
3. Squaready
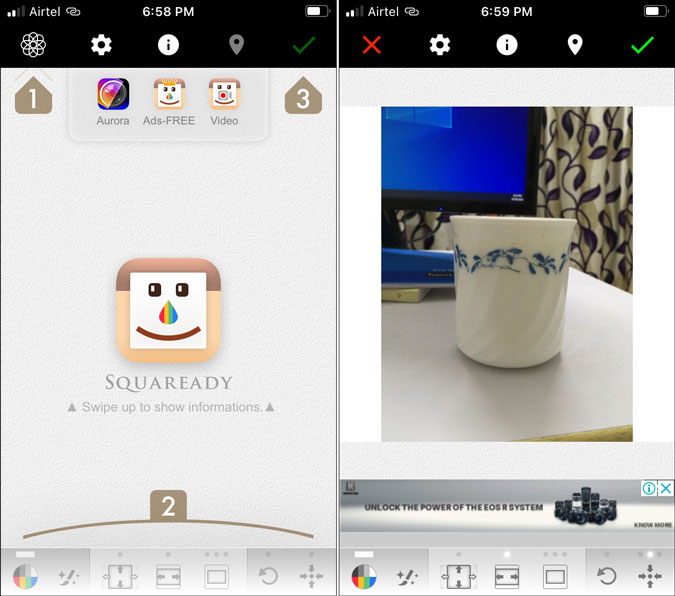
Squaready does the same job as the first two apps, but it is available for iOS only. There are three options to turn your landscape image into a square – you can crop the image, shrink it, and add white space around it.
1: To get started with it, download the Squaready app from the App Store and open it.
2: Tap the first icon on the top-left corner to open the gallery and your image.
3: Choose a border function you want to add. (As mentioned, there are three ways to make a image square.
4: Tap on the green correct icon on the top-right corner.
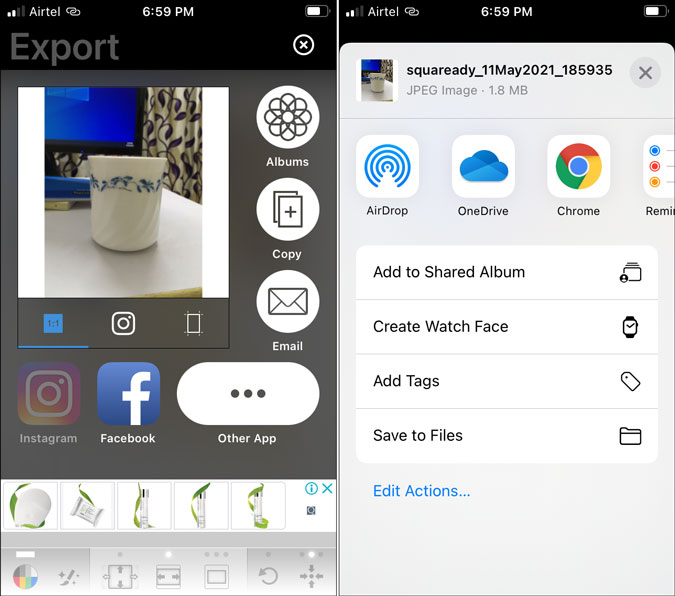
5: Tap the Other App icon if you want to save the image on your phone. However, if you want to share it on Facebook, Instagram, or anywhere else, choose the respective icon.
6: Select the Save to Files option to save the image.
Get Squaready from here
How to make a square photo in Mac Preview app
To make a square photo in Mac Preview app, follow these steps-
- Double-click on the image to open it in the Preview app.
- Press Cmd+A to select the entire image, Cmd+C to copy it, and press Cmd+N to create a new one.
- Press Cmd+A in the new image pane, and press the Delete button.
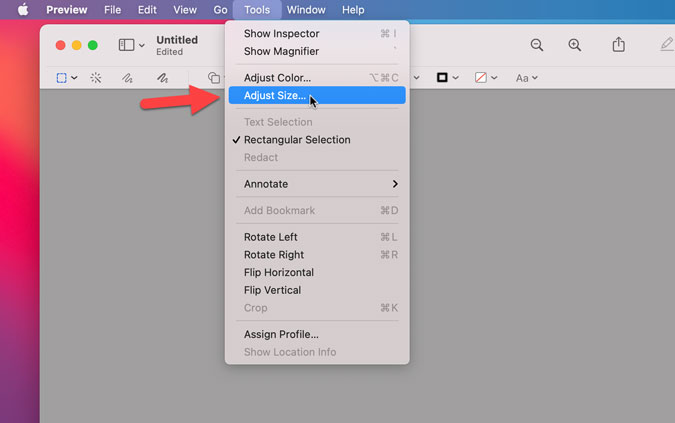
- Select Tools > Adjust Size.
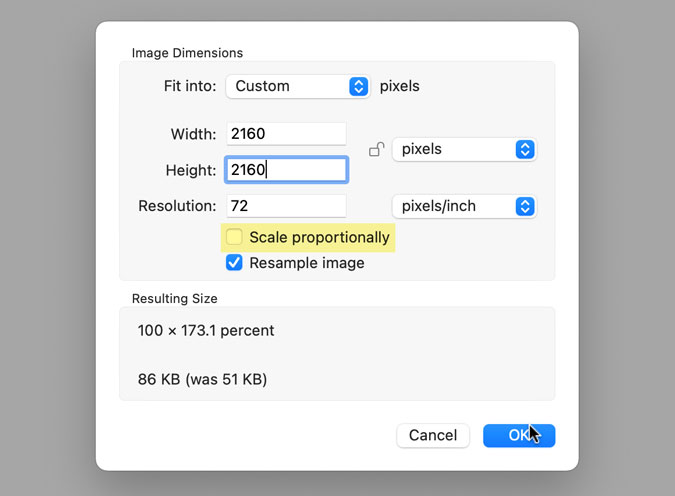
- Click on the lock icon, enter a square size bigger than the original image and click the OK button.
- Press Cmd+V to paste the image.
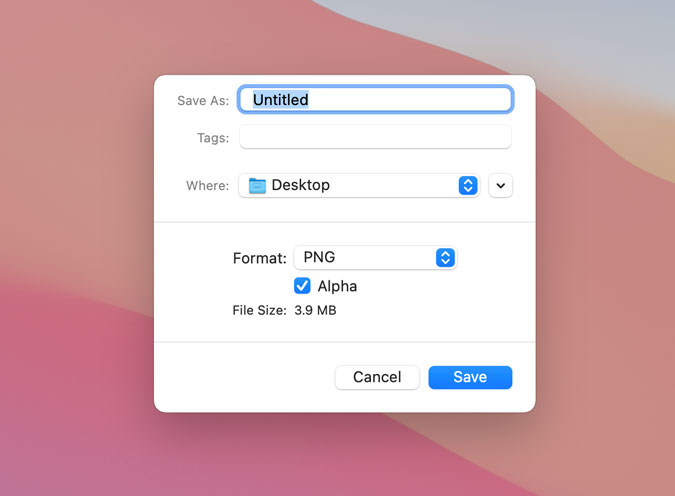
- Press Cmd+S to save the square photo.
It is possible to make square photo in Mac Preview app, which is the in-built app for users to open and edit images. You can use the same tool to create a square photo for Instagram.
To get started, double-click on the image to open it in the Preview app, press Cmd+A to select the entire image, Ctrl+C to copy it, and press Cmd+N to create a duplicate image.
Now, make sure the duplicate image pane is selected. Then, select the image by pressing Cmd+A, and press the Delete button to delete from the current Preview window.
Next, click on the Tools menu, and select the Adjust Size option.
It opens up a window. Click on the lock icon that lets you keep the original aspect ratio of the image. As you do not need that ratio, you need to turn it off by clicking on the respective icon.
Now, enter the size of the square photo. Let’s say you have an image of 700×300 pixels. To make it square, you need to enter at least 700×700 pixels. Whatever you enter, make sure that the new size is bigger than the original size.
After that, press Cmd+V to paste the copied image.
Now, you can save the new image by pressing the Cmd+S button. Once done, you can find the square photo immediately.
How to make square photo in Windows 10 Paint 3D app
To make square photo in Windows 10, follow these steps-
- Open the image with the Paint 3D app on Windows 10.
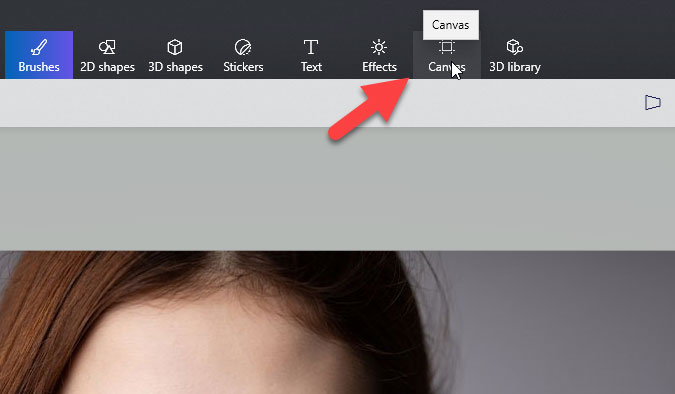
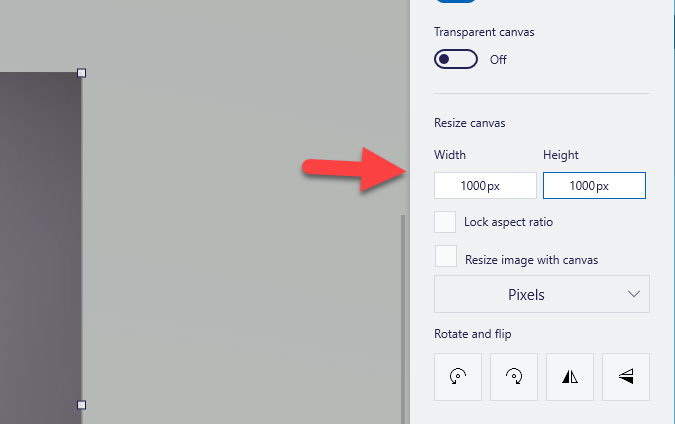
- Click on the Canvas option.
- Choose a square height and width on the right-hand side.
- Press Ctrl+S button to save the image in square size.
If you are using Windows 10, you do not need additional third-party software since Microsoft already included Paint 3D app. To get started, open the Paint 3D app on your PC, and use the Browse files option to open the desired image.
Click on the Canvas option visible on the top menu bar.
On your right-hand side, you can a few options. You have to choose the height and width. Make sure that these things are square in size.
Pro tip: It displays the opened image’s height and width. You have to choose something, which is bigger (or same) than the higher value. For example, you opened a 1000×600 pixels image, make sure that you have selected at least 1000×1000 pixels.
Then, remove the tick from the Lock aspect ratio and the Resize image with canvas checkboxes. You can find the square image on your screen. Press Ctrl+S to same the image.
How to make square photo in Photoshop
To make square photo in Photoshop, follow these steps-
- Open the image in Photoshop.
- Press Ctrl+A, Ctrl+C and Ctrl+N.
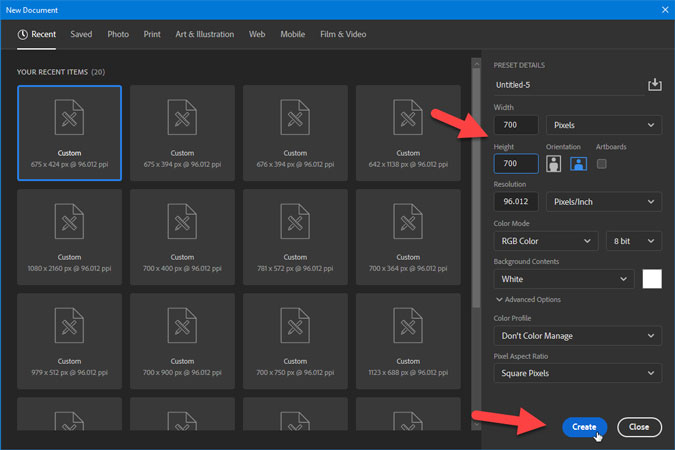
- Enter a square height and width and click the Create button.
- Press Ctrl+V to paste the image.
- Press Ctrl+S to open the image.
- Select JPG or PNG folder and save your image.
If you are using Photoshop, you can use it to make square photo within moments. To get started, open the desired image in Photoshop.
Now, you have to obtain the opened image’s height and width so that you can make a square photo accordingly. For that, press Ctrl+A to select the entire image, Ctrl+C to copy the image, and Ctrl+N to create a new image.
Next, you can already see the current image’s height and width on your screen. You have to enter a square image size accordingly and click the Create button.
Now, you can paste the copied image by pressing Ctrl+V.
Once done, press Ctrl+S to save the image. You have to choose PNG or JPG, enter a name, and select the path where you want to save it.
Tip: If you are using Photoshop on a Mac computer, press Cmd instead of Ctrl.
This article shows all the methods irrespective of the platform you are using. If you still have some problems making a photo square, do let us know.
Read: Fix Waiting for download error on Google Play Store
